Table of contents
Understanding bolt strain gauge technology
Strain measurement is a crucial aspect in engineering, focusing on quantifying the deformation of a material, typically denoting the relative change in length of a component subjected to stress. This deformation can manifest as either extension (elongation) or contraction (compression), commonly referred to as tensile and compressive strain. Positive strain characterizes the result of expanding the component, while negative strain signifies compression.
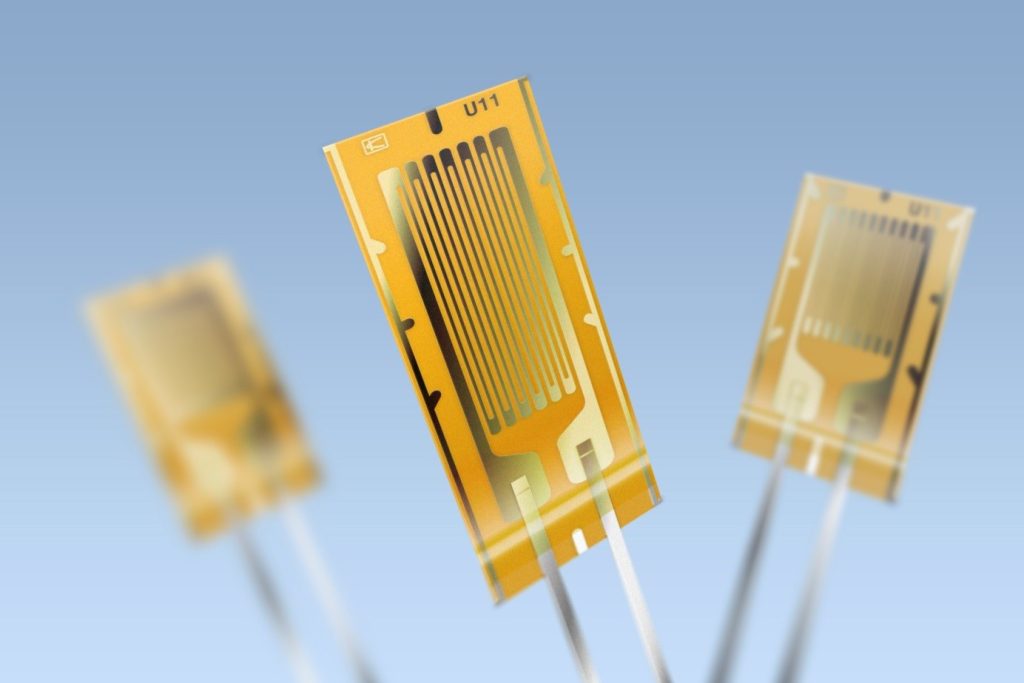
To execute strain measurement, strain sensors come into play, actively gauging the strain resulting from applied forces on the structure. The alteration in resistance induced by these forces correlates with the strain, and this relationship is defined by a crucial parameter known as the gauge factor. Among the diverse strain measurement technologies available, strain gauge technology stands out as the predominant and widely adopted method.
In the realm of bolt strain measurement, strain gauge sensors take center stage. These sensors are strategically placed within the screw, offering a linear output. This means that the strain gauge’s response is directly proportional to the applied forces, providing a reliable and consistent measurement of strain in the bolt. Leveraging strain gauge technology in bolts is not only prevalent but also represents a sophisticated and accurate approach to monitoring the structural integrity of bolted connections under varying stress conditions.
Strain gauge in bolted structures
When fastening structures through the tightening of bolts or studs, a tensile force is imparted to the shank of the fastener. This tensile force, in turn, induces a compressive or clamping force on the interconnected members. In the absence of external forces, this clamping force precisely matches the tension within the bolt or stud. Consequently, employing a load sensing fastener allows for a highly accurate measurement of this clamping force.
During service, the preload in bolts may be diminished due to various factors, posing the risk of malfunction or failure. The use of strain gauge bolts facilitates the measurement of bolt load, offering a means to mitigate such issues. It is imperative, however, to conduct measurements on the bolted assembly when devoid of external or service loads to enable direct before-and-after comparisons.
Bolts with strain gauge prove invaluable in assessing the effects of operational service loads, with the caveat that these bolts do not directly measure service loads. An exception arises when the service load surpasses the clamping preload, leading to joint separation. In such instances, the service load aligns with the bolt load, accurately measured by the strain gauge incorporated into the bolt.
How to bond a strain gauge into a bolt step by step
Designing a strain gauge system for measuring tightening and bolt stress involves a distinct approach compared to the traditional installation of flat strain gauges. This discourse outlines guidelines for the installation and utilization of cylindrical strain gauges tailored specifically for this purpose.
The employment of cylindrical strain gauges introduces a novel methodology by seamlessly integrating them into a bore drilled through the bolt head. Through the application of a specialized strain gauge and adhesive, a streamlined solution emerges for quantifying the axial load exerted on bolt components. This innovative technique offers enhanced accuracy and efficiency in measuring the tightening stress experienced by the bolt.

Required Equipment
1. Cylindrical Strain Gauges: Specifically designed for measuring strain, force, and vibrations in screws, bolts, or other structural elements. These gauges are cylindrical in shape, ensuring optimal compatibility with the intended applications.
2. Strain Gauge Adhesive: An easy-to-handle, hot-curing epoxy resin adhesive specifically formulated for use with cylindrical strain gauges. This adhesive is tailored to provide reliable bonding, ensuring the seamless integration of the gauges into the targeted components.
3. Strain Gauge Cleaning Material: Cleaning agents designed for preparing measuring points and surfaces of measurement objects before the installation of strain gauges. This step is crucial to ensure a clean and suitable surface for accurate measurements.
4. Other Equipment:
◦ Drilling Machine: Essential for creating precise holes through the bolt heads or other designated areas for the installation of cylindrical strain gauges.
◦ Solder Iron and Equipment: Utilized for secure and robust connections during the installation of strain gauges, ensuring reliable data transmission.
◦ Bridge Amplifier Supporting Strain Gauge ¼ Bridges: An integral component for the measurement system, amplifying and processing the signals generated by the strain gauges. This equipment supports the efficient and accurate recording of strain data.
Assembling and utilizing this comprehensive set of equipment will contribute to a precise and effective implementation of cylindrical strain gauges for measuring strain, force, and vibration in various construction elements.
Engineering procedure for bolt Strain Gauge installation
Step 1: Drilling a Hole in the Bolt
In the initial phase, employ a drilling machine to bore a hole in the center of the bolt with a diameter of 2 mm and an appropriate depth. The drilling depth is contingent upon the specific characteristics of the bolt. It is imperative to ascertain that the strain gauge is positioned in an area where maximum strain is anticipated. Additionally, consider the stiffness of the bolt, as drilling reduces its cross-sectional area. This reduction may impact the durability of the bolt in certain cases, as the axial force must now be distributed across this diminished cross-sectional area.
Subsequently, cleanse the drilled hole by spraying and allow it to air dry (compressed air can be utilized as well). This step is crucial to eliminate any residual dirt particles, metal chips, or dust from the inner walls of the hole. It is imperative to ensure that the drilling is completely dry post-cleaning to maintain optimal conditions for strain gauge adhesion.
Step 2: Strain Gauge Preparation for bolt
Moving on to the subsequent phase, extract a strain gauge from its packaging.
Using scissors, cut an approximately 20mm-long segment of Teflon cord from the provided roll.
With the aid of tweezers, hold the strain gauge at the enameled copper wires and carefully insert the Teflon cord into the cylindrical strain gauge.
Position the meticulously prepared strain gauge on a pristine and unblemished surface.
Step 3: Adhering the Strain Gauge
Utilize a bench vise to secure the bolt firmly during the bonding process with the strain gauge.
Load a syringe or pipette with a hot-curing epoxy resin adhesive specifically designed for applications involving cylindrical strain gauges. It is crucial to prevent the formation of air bubbles throughout all stages of the installation.
In the subsequent step, inject the pre-drilled bolt with the adhesive using the syringe. To minimize the presence of air bubbles, ensure the syringe tip reaches the bottom of the drilled hole before dispensing the adhesive. Once the hole is adequately filled, gradually withdraw the syringe, simultaneously replenishing adhesive to prevent air entrapment.
After completing the adhesive application, use cleaning pads to meticulously remove any residual adhesive from the surface of the bolt. Ensure that the bolt’s surface is thoroughly cleaned for optimal strain gauge adhesion.
Subsequently, delicately insert the strain gauge into the hole of the bolt. Exercise caution to avoid compressing the strain gauge during insertion. The cylindrical strain gauge, along with the Teflon cord, should be positioned at the bottom of the hole. To alleviate the presence of air bubbles, gently maneuver the strain gauge up and down within the adhesive, allowing any trapped air to escape.
Step 4: Adhesive Curing Process
Allow the adhesive to cure within the specified time frame in an oven. The recommended curing times for the adhesive are clearly outlined in the instruction manual.
Temperature [°C/°F]: 60/140
Curing Time: Approximately 3 hours
Optional Post-curing: Additional 4 hours
Upon completion of the curing process, use scissors to trim the protruding Teflon cord from the hole. It’s essential to leave the remaining Teflon cord in place as part of the installation. With this step concluded, the bolt strain gauge is now prepared for subsequent phases of the installation process.

Advantages of Bolt Strain Gauge Technology
Precision tightening and preload measurement: Fasteners can be precisely tightened, and their preload can be measured with a remarkable accuracy, often surpassing a tolerance of better than 1% of the maximum load. This stands in stark contrast to the conventional method of load measurement using a torque wrench, where the accuracy is notably inferior, often reaching discrepancies of +/-30%.
Post-assembly inspection for preload measurement: Bolted equipment can undergo inspection post-assembly to gauge the preload on tightened bolts. This offers a valuable means of ensuring that the desired preload is achieved, enhancing the reliability and longevity of bolted connections.
Built-in sensors for overload detection: Internally gaged fasteners strategically positioned within equipment serve as built-in sensors, facilitating efficient overload detection. This intrinsic sensing capability is particularly advantageous in preemptively identifying and addressing potential issues arising from excessive loads.
Real-time monitoring under service conditions: Assemblies can be actively monitored and inspected under both simulated and actual service conditions. This enables the assessment of external forces to determine if they surpass the established preload. Overloads resulting from factors like vibration or shock can be readily measured at any point during the assembly’s operational life.
Permanent installation for continuous analysis: Bolts may be permanently installed, offering a consistent and accurate analysis of bolt loading over an extended time period. In applications of this nature, internally gaged bolts evolve into a fundamental research tool, providing valuable insights into the long-term behavior and performance of bolted connections.

Inconveniences of Bolt Strain Gauge Measurement
Strain gauge bolt load measurement involves affixing a small sensor onto the bolt, connected to a measuring device. This sensor, comprised of resistances, theoretically undergoes the same deformation as the bolt being tightened, resulting in a change in its resistance value. It is through this resistance variation that elongation and tightening force are deduced.
However, there are notable drawbacks to this approach:
Strategic Sensor Placement: One inconvenience lies in the necessity of strategically placing the sensor at a location representative of the deformations to be measured. This requires careful consideration to ensure accurate and meaningful measurements.
Modification of Bolts: The method is considered intrusive, requiring modification of the bolt for measurement purposes. This intrusion involves creating a cavity in the bolt to thread the wires connecting the sensor to the measuring device. This modification may not be practical in all scenarios.
Laboratory-Centric Method: The strain gauge method is predominantly suited for laboratory settings. Its intrusive nature and the need for specialized modifications make it less practical for routine field applications.
Delicate Installation Process: Implementation of this method is intricate, and the installation of strain gauges can be both delicate and challenging. The complexity of the process can lead to potential errors and increase the overall cost of the installation.
Cost and Difficulty of Installation: Strain gauges are known for their intricacy and can be challenging and costly to install. The precision required in placing the gauges and the associated labor can contribute to higher overall expenses, making it less economically viable for certain applications.
Limited Adaptability to Real-Time Monitoring: The intrusive nature of the method and the need for pre-modification hinder its adaptability to real-time monitoring of bolted connections under dynamic operational conditions. This limitation makes it less suitable for applications requiring continuous and immediate feedback.
Enhanced Bolt Load Measurement: the advantages of ultrasonic bolt tension meters
The ultrasonic bolt tension meter presents several advantages over traditional methods for bolt load measurement, making it a superior choice in various applications:
Non-intrusive method: Unlike some other methods, the ultrasonic bolt tension meter is non-intrusive. It does not require the modification or drilling of bolts for sensor installation, ensuring the structural integrity of the bolt is maintained. This non-intrusive nature simplifies the measurement process and eliminates the need for potentially damaging alterations to the bolts.
Universal applicability: One of the key advantages of an ultrasonic bolt tension meter is its ability to work on virtually every type of bolt or screw. The technology is adaptable to different sizes, materials, and thread types, making it a versatile solution for a wide range of industrial applications. This universality enhances its practicality and efficiency in diverse settings.
Designed for on-site industrial use: Ultrasonic bolt tension meters are specifically designed for on-site industrial use. Their robust construction and durability make them well-suited for the challenging conditions often encountered in industrial settings. This design ensures reliable and accurate measurements in real-world applications, contributing to the efficiency and safety of industrial operations.
Temperature correction capability: One notable feature of ultrasonic bolt tension meters is their ability to perform temperature correction on the measurements. Temperature variations can impact the accuracy of load measurements, and these devices are equipped to account for such changes. This capability ensures that the measured bolt load values are corrected for temperature fluctuations, providing more precise and reliable results under varying environmental conditions.
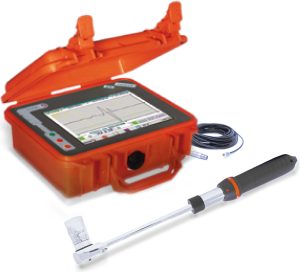
In summary, the TRAXX-M2 ultrasonic bolt tension meter stands out as a superior method for bolt load measurement due to its non-intrusive nature, universal applicability, suitability for on-site industrial use, and the ability to perform temperature correction, enhancing its accuracy and versatility in diverse applications.